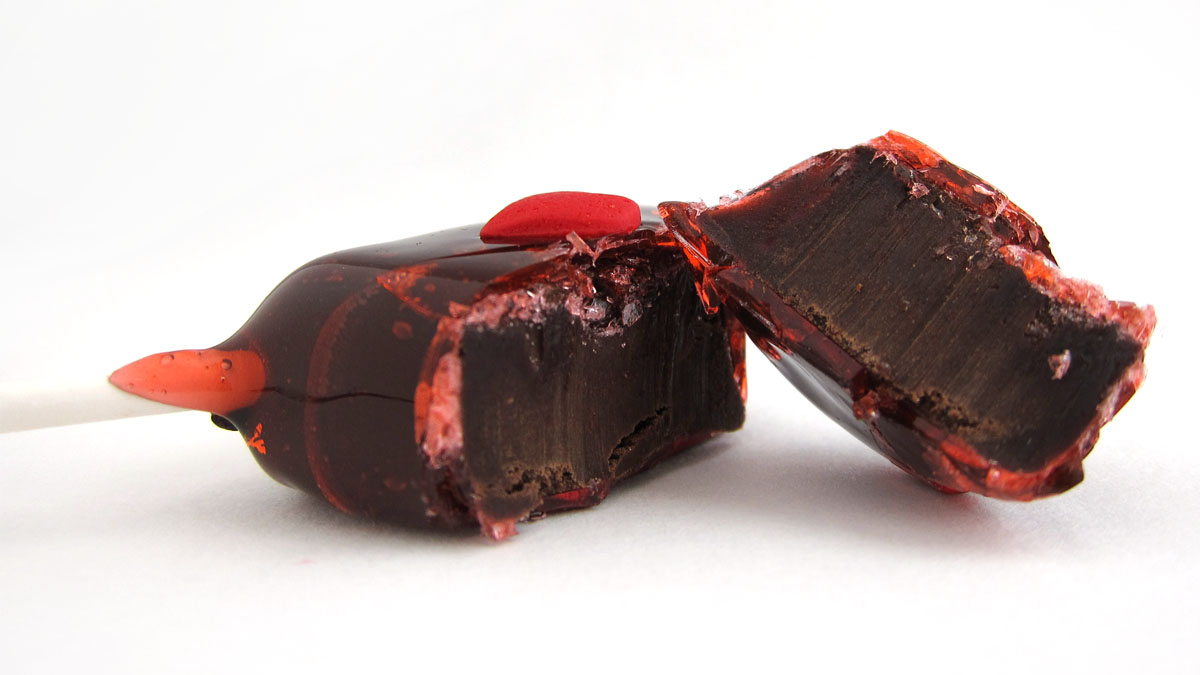
Make homemade Tootsie Pop-style lollipops at home using the microwave. These Cherry Heart Pops with Chewy Chocolate Centers are fun to make for Valentine's Day or any day.

Do you love Tootsie Rolls and Tootsie Pops? I sure do. Even as an adult, I will find myself oftentimes enjoying these sweet treats.
If you have ever made modeling chocolate you know how much it tastes like a Tootsie Roll. Not only does it have a similar chocolate flavor but it has the same texture too.
I thought it would be fun to see if I could use modeling chocolate to create homemade Tootsie Pops. I wasn't sure if it would hold up to being dipped in boiling sugar.
To my delight, it worked great if the modeling chocolate was frozen prior to dipping. So, I decided to try my hand at making my own version of a Tootsie Pop.
Being Valentine's Day is just around the corner I decided to make my lollipops heart-shaped. Instead of rolling the homemade Tootsie Rolls into balls, I cut them into hearts before dipping them in cherry-flavored hard candy.
I know candy-making can be intimidating, but I used a technique to make these lollipops that I think you will find very manageable. For simplicity's sake, I used a microwave recipe for making the hard candy coating.
I find it so quick and easy, but if you prefer, you can use a traditional stovetop method to make your hard candy coating.
Ingredients
This recipe was originally published on Hungry Happenings on February 11, 2011. I updated the post with better pictures and instructions and hope you enjoy this recipe.
homemade Tootsie Rolls
semi-sweet chocolate - Choose good dark chocolate that you enjoy eating on its own. You can use chips if you like.
light corn syrup - Corn syrup will add sweetness but more importantly, will give your homemade Tootsie Rolls a good chewy texture.
cocoa powder - You'll just use this to dust your work surface.
- Update: I've actually found more recently, that you can roll your modeling chocolate out on a silicone mat using a fondant roller and skip the cocoa powder altogether.
microwave hard candy
light corn syrup - Corn syrup adds sweetness to hard candy plus it keeps your candy from crystallizing.
granulated sugar - The primary ingredient in hard candy.
cherry oil - You can use cherry candy flavoring or any other flavor you like.
red or neon pink food coloring - Liquid food coloring works the best to color your hard candy.
heart-shaped sprinkles- If you want to decorate your lollipops you can add sprinkles or colored sugar.
Supplies
I receive a small commission if you make a purchase using any of the affiliate links below at no extra cost to you.
lollipop sticks
baking sheet lined with non-stick aluminum foil or a silicone mat or Silpat
heat-resistant spatula or wooden spoon
microwave-safe glass bowl
plastic wrap
instant-read thermometer, optional
Instructions
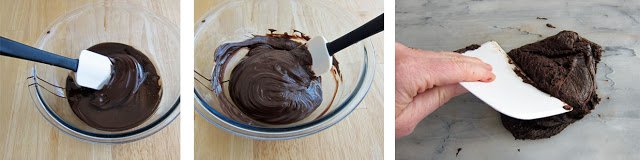
step 1: stir corn syrup into melted chocolate
- Melt Chocolate (click here for detailed instructions.)
- Allow it to cool, stirring occasionally until the chocolate cools to 91 degrees. If you don't have a thermometer, put a drop of chocolate on your lip and it should feel cool.
- Stir in ½ cup corn syrup. The mixture will get really thick quickly.
- Pour it onto a countertop and knead until shiny and smooth. If it feels dry, add 1-1 ½ tablespoons corn syrup and continue to knead until smooth. See the modeling chocolate recipe for more detailed instructions and more troubleshooting information.
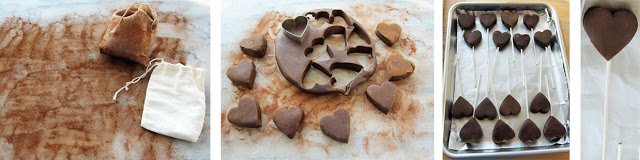
step 2 -cut out chocolate hearts and insert lollipop sticks
- Pat chocolate into a disc.
- Lightly dust your work surface with cocoa powder. (Tip: I fill a spice bag with cocoa powder then tap it gently on my work surface to get a very light dusting.)
- Use a 1" heart-shaped cookie cutter to cut out 14-16 hearts, re-rolling chocolate as needed.
- Press the chocolate out of the cookie cutter and smooth out the surface of the chocolate with your finger.
- Insert a lollipop stick into the pointed end of each heart and set it on your prepared baking sheet.
- Place in the freezer for one hour. At the end of the hour, begin to make the hard candy coating.
make hard candy
step 1 - boil sugar and corn syrup
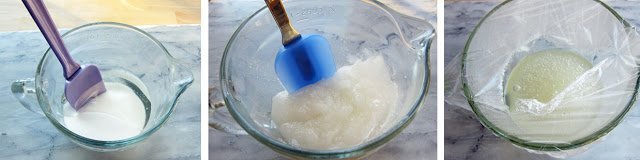
- Pour corn syrup into a 4-cup microwave-safe measuring cup or mixing bowl.
- Add sugar and stir to combine.
- Cover tightly with plastic wrap and microwave on high power for 3 minutes.
- Remove from microwave using potholders.
- Use a knife to poke a hole in the plastic wrap to allow the steam to vent, then very carefully remove the plastic wrap.
- Stir, then put a new piece of plastic wrap on the bowl.
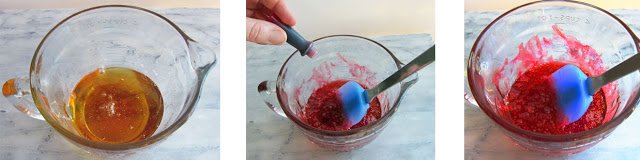
step 2 - continue to heat the hard candy then add food coloring and flavoring
- Heat in the microwave on high power for 2 ½ - 3 minutes until sugar becomes lightly golden brown.
- Watch your candy coating closely while it's cooking, to make sure that it doesn't burn.
- Remove, using pot holders, poke a hole in the plastic wrap to allow steam to escape then carefully remove the plastic wrap.
- Pour in cherry oil and food coloring (mixture will bubble vigorously).
- Stir just to blend.
CAUTION: This candy coating is extremely hot and can burn skin quickly. DO NOT TOUCH!!!! If you do drop some on your hands, don't put you hand in your mouth (a bad reflex in this situation.)
As a precaution, you can have a bowl of ice water set next to your workstation. Dip your hand in the ice water immediately to harden the candy. If you are burned, consult a doctor.
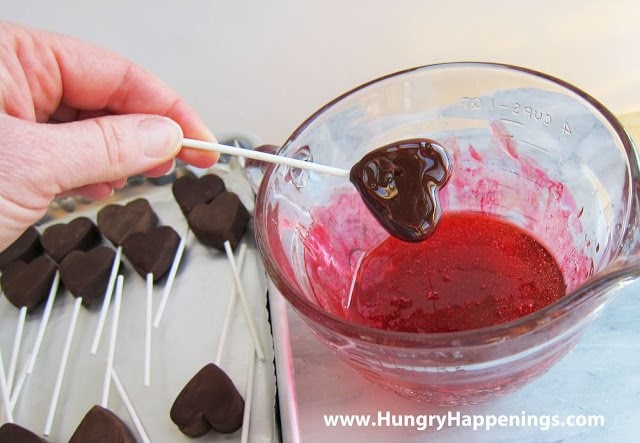
step 3 - dip the homemade Tootsie Rolls in hot candy coating
- Remove the chocolate Tootsie Roll hearts from the freezer.
- Dip each heart in cherry candy coating (or use a heatproof spatula to pour candy coating over all sides of each heart.)
- Holding the heart pop over the bowl, gently shake it, allowing the excess candy to drip back into the bowl.
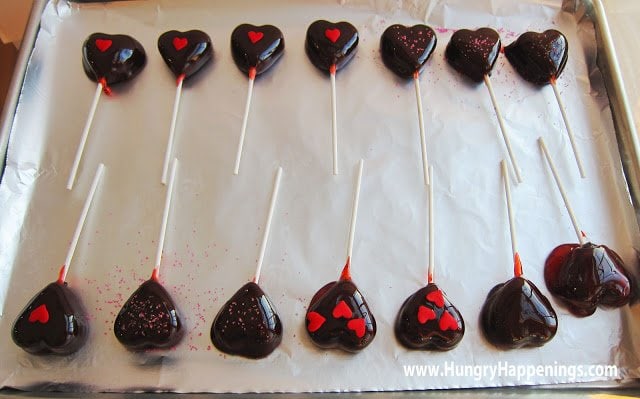
- Set your lollipops on a Silpat silicone mat or non-stick aluminum foil.
- Immediately after dipping each heart, sprinkle with colored sanding sugar or add candy decorations.
TIPS
- Be very careful to not touch the hot candy while decorating.
- The lollipops will harden very quickly and as you dip your hearts, the candy in the bowl will become thick. As needed, re-heat the candy in the microwave for 5-10 seconds before continuing to dip more pops.
- Allow the homemade lollipops to cool completely before eating.
The last few pops you dip may not look perfect and you may even have one or two that you can't coat if you don't work quickly.
The hard candy mixture can only be re-heated so many times before it will get so hot it will melt the hearts.
Just snack on the rejects.
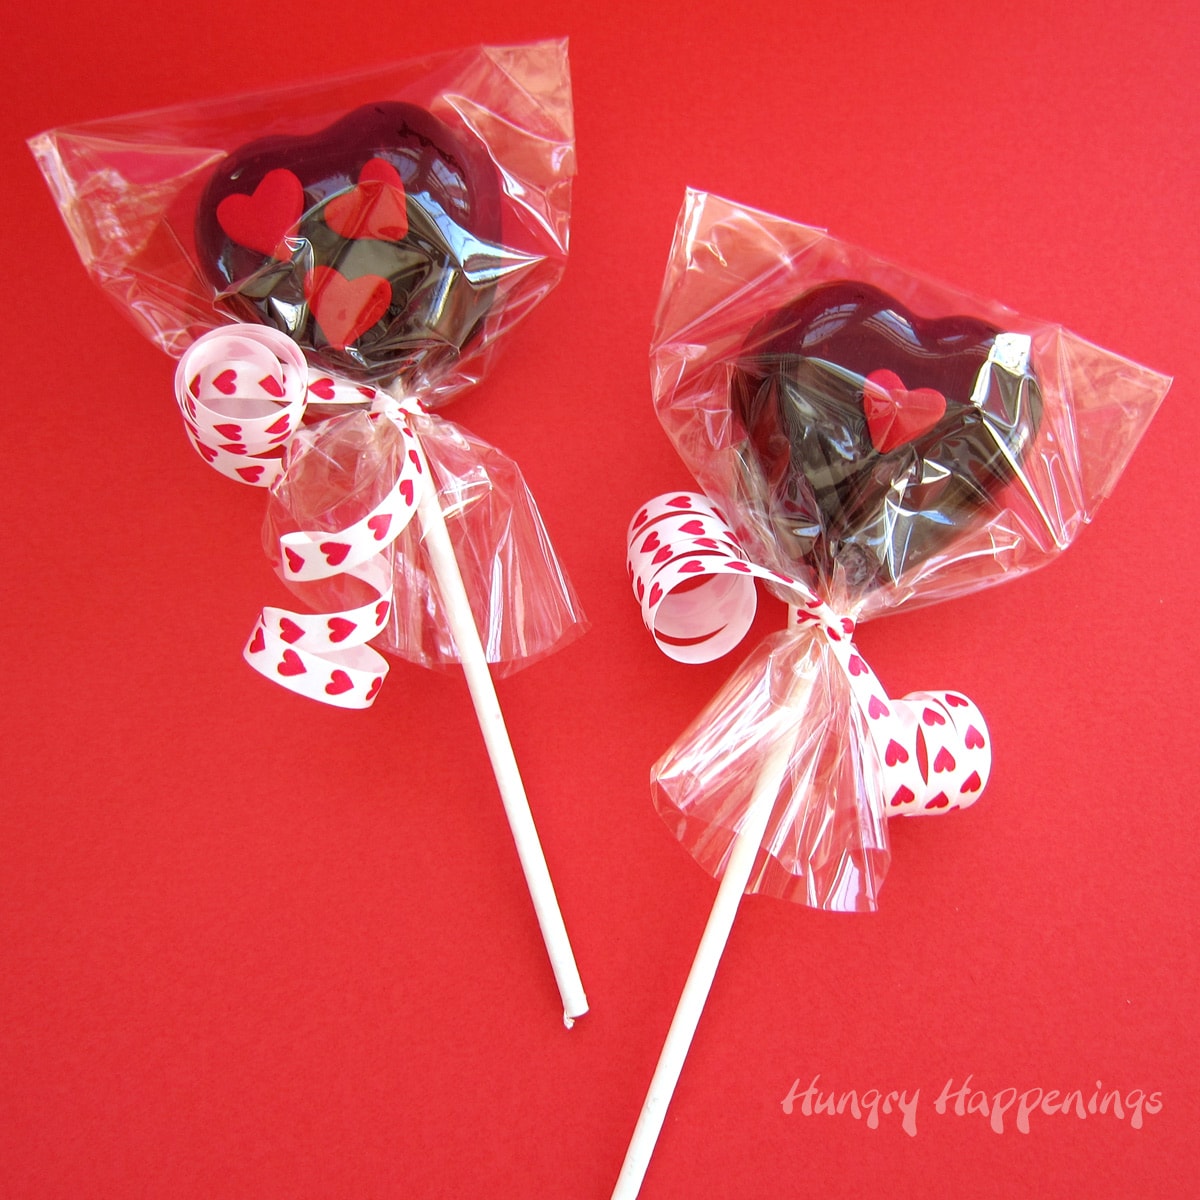
To share these Valentine's Day lollipops with your loved ones you can wrap them in cellophane bags and tie them with a ribbon.
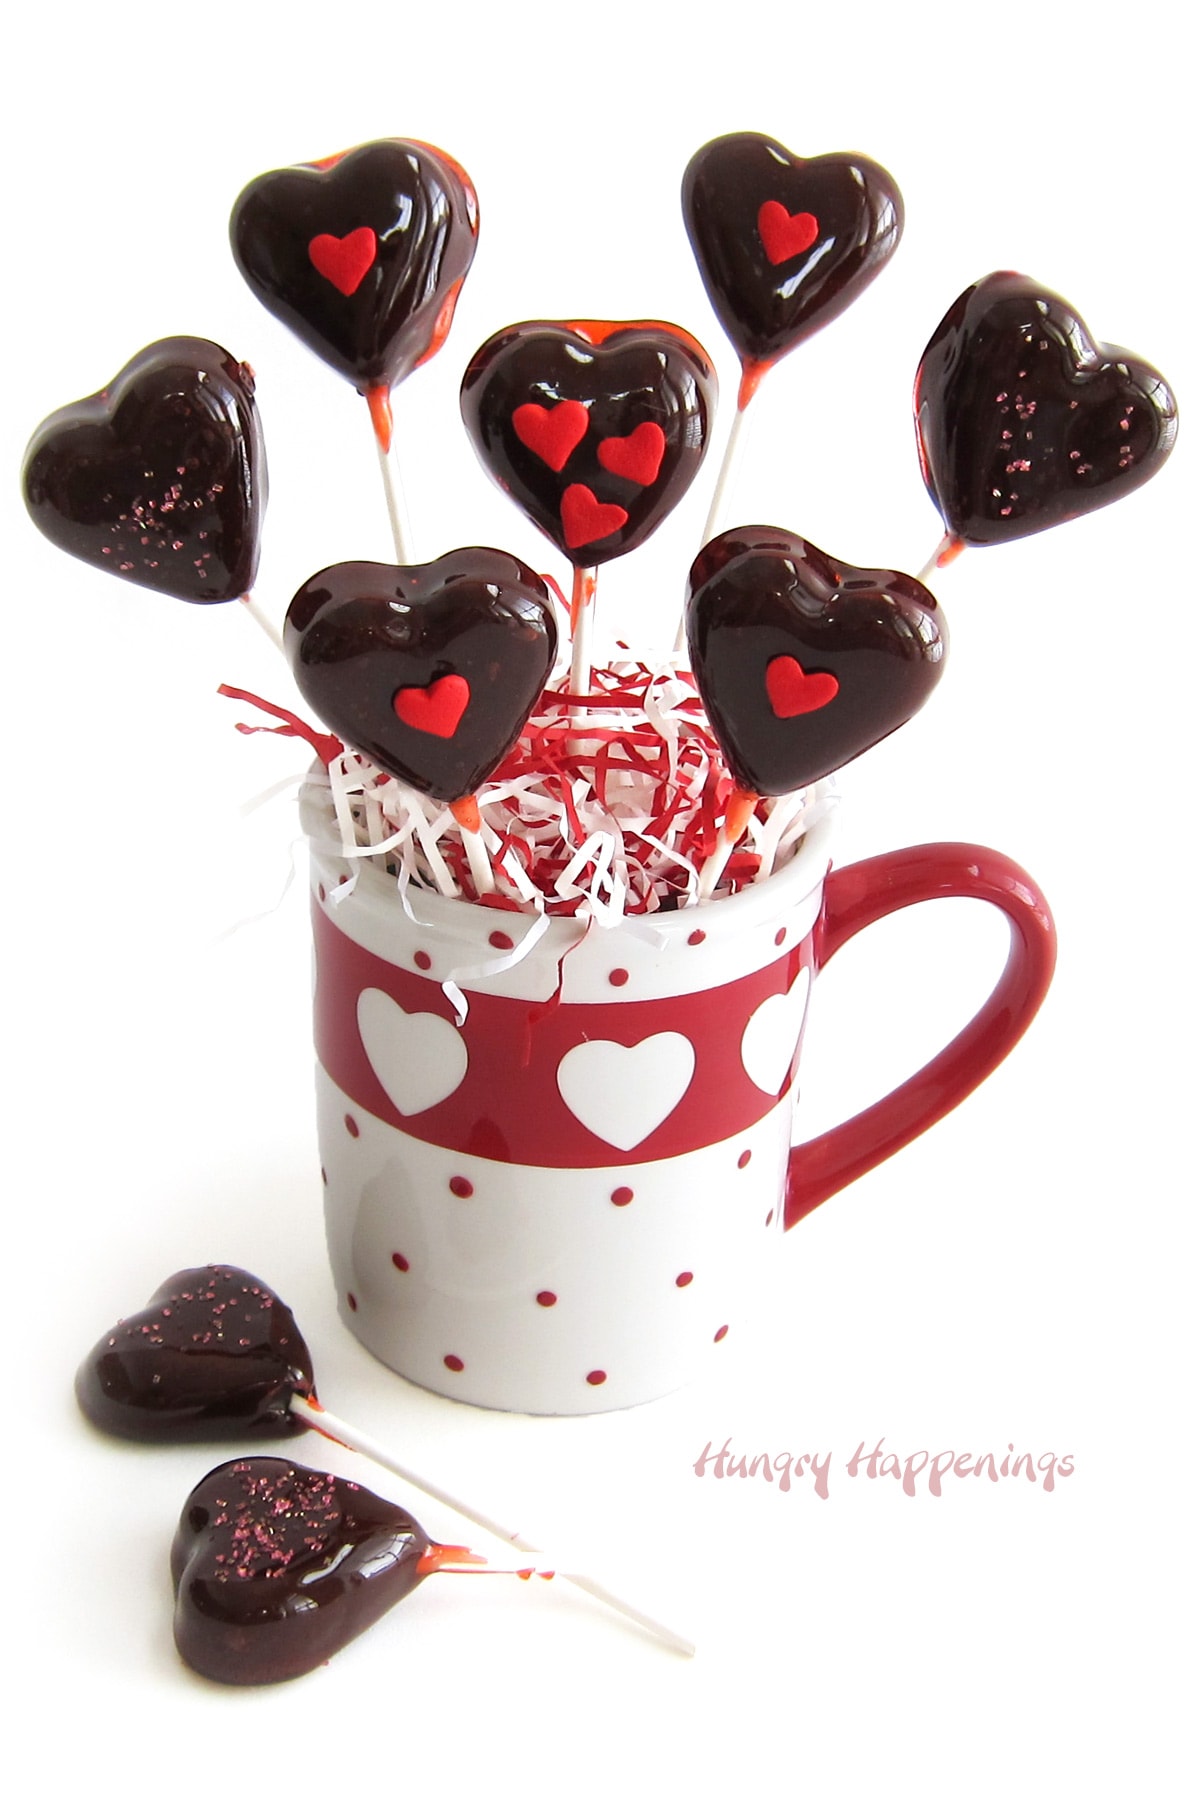
If you are more adventurous, you might want to create a bouquet out of your handmade lollipops, as I did.
arrange the lollipops in a bouquet
- Fill a Valentine's Day coffee mug with an Oasis Wet Floral Foam Brick cut to fit.
- Then, top it with some red and white shredded paper. (You can just fill the mug with the shred, but the pops will hold in place better if secured in the oasis.)
- Arrange your heart pops coming out of the mug by inserting them into the oasis.
- You can overwrap the bouquet with clear cellophane and tie it all up with a big bow.
Related Recipes
Check out all of my Valentine's Day Recipes.
Recipe

Heart-shaped cherry lollipops filled with chewy chocolate centers make fun treats for Valentine's Day.
- 8 ounces semi-sweet chocolate, finely chopped (or chips)
- ⅓ cup light corn syrup, plus more if needed
- cocoa powder, for dusting work surface
- ½ cup light corn syrup
- 1 cup granulated sugar
- ½ teaspoon cherry oil or other flavoring
- 15 drops liquid red or neon pink food coloring
- optional toppings-colored sanding sugar or heart shaped sprinkles
-
Melt the chocolate in the microwave on high power for 30-second bursts of power, stirring after each.
-
Allow the chocolate to cool, stirring occasionally until the chocolate cools to 91 degrees Fahrenheit.
-
Stir in the corn syrup.
-
Pour onto a countertop and knead until shiny and smooth.
-
If it feels dry, add 1-1 ½ tablespoons corn syrup and continue to knead until smooth.
-
Lightly dust your work surface with cocoa powder.
-
Roll the modeling chocolate out to about ¾ inch thickness.
-
Use a 1" heart-shaped cookie cutter to cut out 14-16 hearts, re-rolling the chocolate as needed. Press the chocolate out of the cookie-cutter and smooth out the surface of the chocolate with your finger.
-
Insert a lollipop stick into the pointed end of each heart and set on your prepared baking sheet.
-
Place in the freezer for one hour.
-
At the end of the hour, begin to make the hard candy coating.
-
Pour corn syrup into a 4-cup microwave-safe glass measuring cup or mixing bowl.
-
Add the sugar and stir just to combine.
-
Cover tightly with plastic wrap and microwave on high power for 3 minutes.
-
Remove the bowl from the microwave and carefully remove the plastic wrap.
-
Stir, then put a new piece of plastic wrap on the bowl.
-
Heat in the microwave on high power for 2 ½ to 3 minutes until the sugar becomes lightly golden brown.
-
Remove and carefully remove the plastic wrap.
-
Pour in the cherry oil and the red or pink food coloring (mixture will bubble vigorously).
-
Stir just to blend.
-
Dip a frozen chocolate heart pop into the hot candy then top with sprinkles, if desired.
-
Set on a silicone mat or non-stick aluminum foil.
-
Repeat, heating the candy coating in the microwave for 5-10 seconds as needed.
-
Allow the pops to cool completely.
- Be very careful to not touch the hot candy while decorating.
- The lollipops will harden very quickly and as you dip your hearts, the candy in the bowl will become thick. As needed, re-heat the candy in the microwave for 5-10 seconds before continuing to dip more pops.
- Allow the homemade lollipops to cool completely before eating.
- Store at room temperature for up to a few months.

- Banana Split Bars – A Fun and Easy Summer Dessert - March 4, 2026
- Pineapple Fudge (No Candy Thermometer Needed!) - March 4, 2026
- No-Bake Peanut Butter Pie Recipe - March 3, 2026
Audrey Howitt aka Divalounger says
Festive and they look fairly easy to make!
Cute Everythign says
Great job! Love the pics, they look sooo yummy! And it's always nice to have a back up camera!
Jersey Girl Cooks says
These look beautiful and now I am craving chocolate!
Angela FRS says
Those look gorgeous!
Angela FRS says
Those look gorgeous!