For Easter this year, turn ordinary Rice Krispie treats into these adorable Hatching Chicks Rice Krispies Treats! It's an easy recipe and a great project for you and your kids!
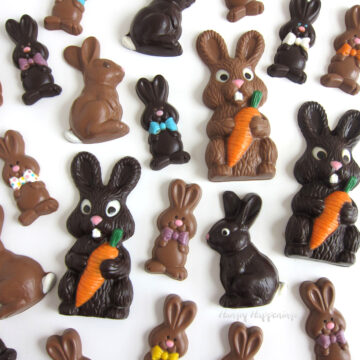
Don't you just love how cute everything is at Easter time? All those fuzzy little baby chicks, ducks, and bunnies are just so adorable and they are even sweeter when they are made of chocolate. One of my oldest and most cherished candy molds is of a chicken hatching from an egg.
Using this mold, I create the single most popular Easter chocolate that I sell. So when I went about designing a chocolate-dipped rice krispies treat for Easter, I knew I wanted to make a hatching chick. I just didn't know exactly where my decorating would take me.
There were so many different designs floating around in my head. I'm sure I could have made dozens of unique little chicks each with its own personality.
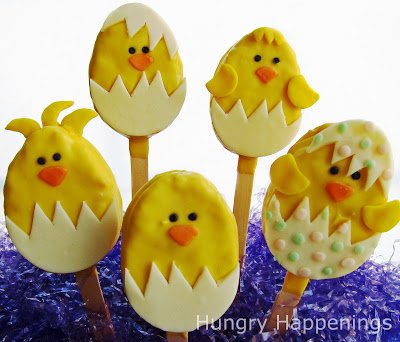
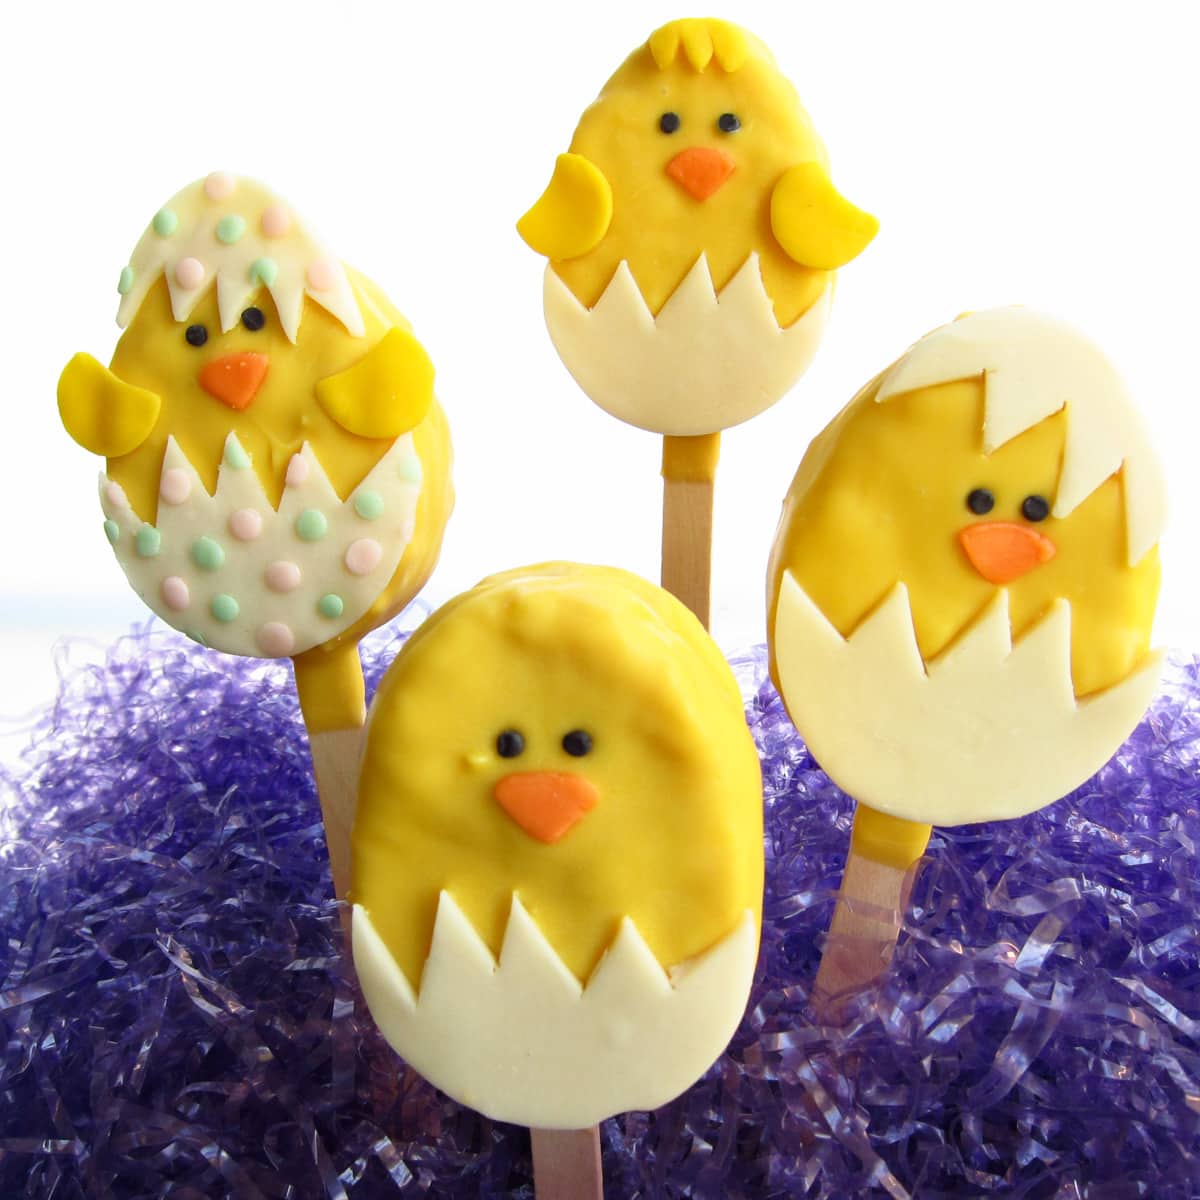
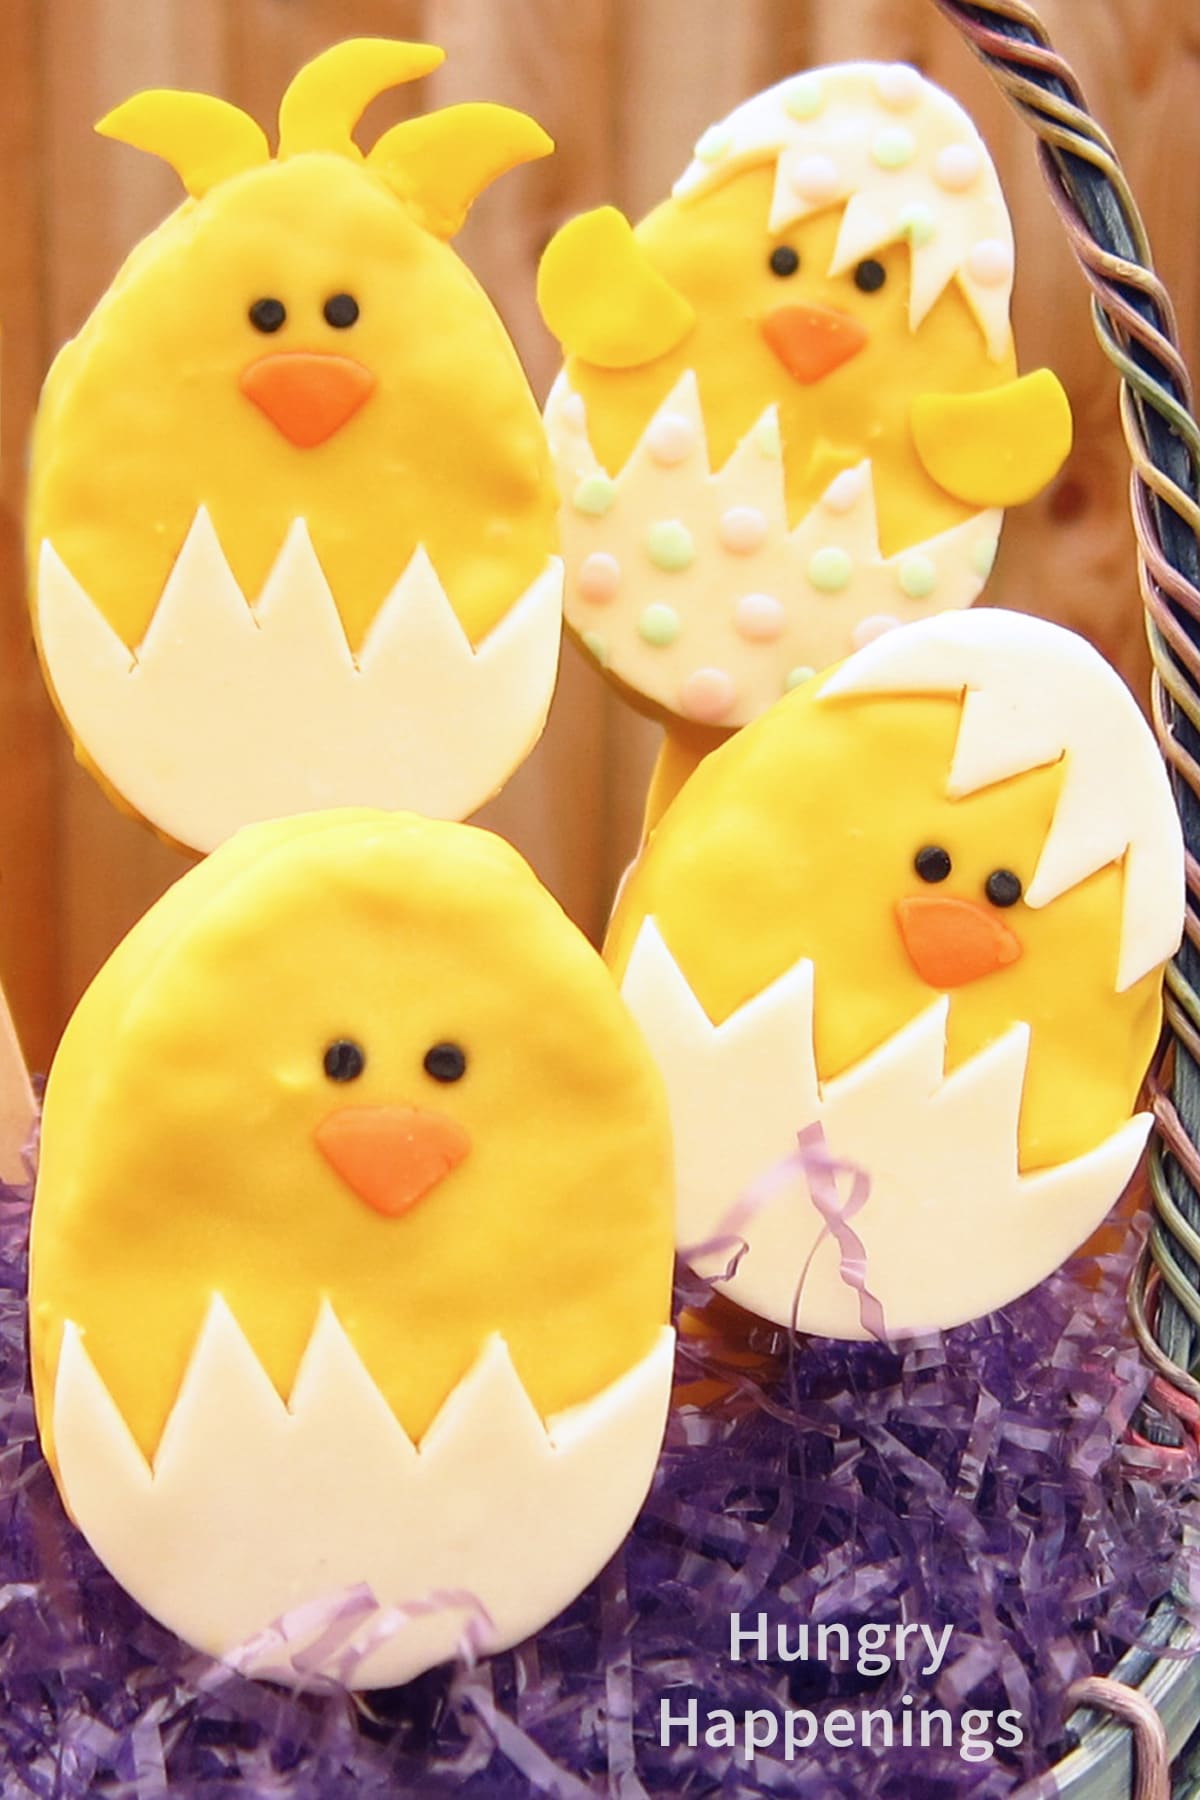
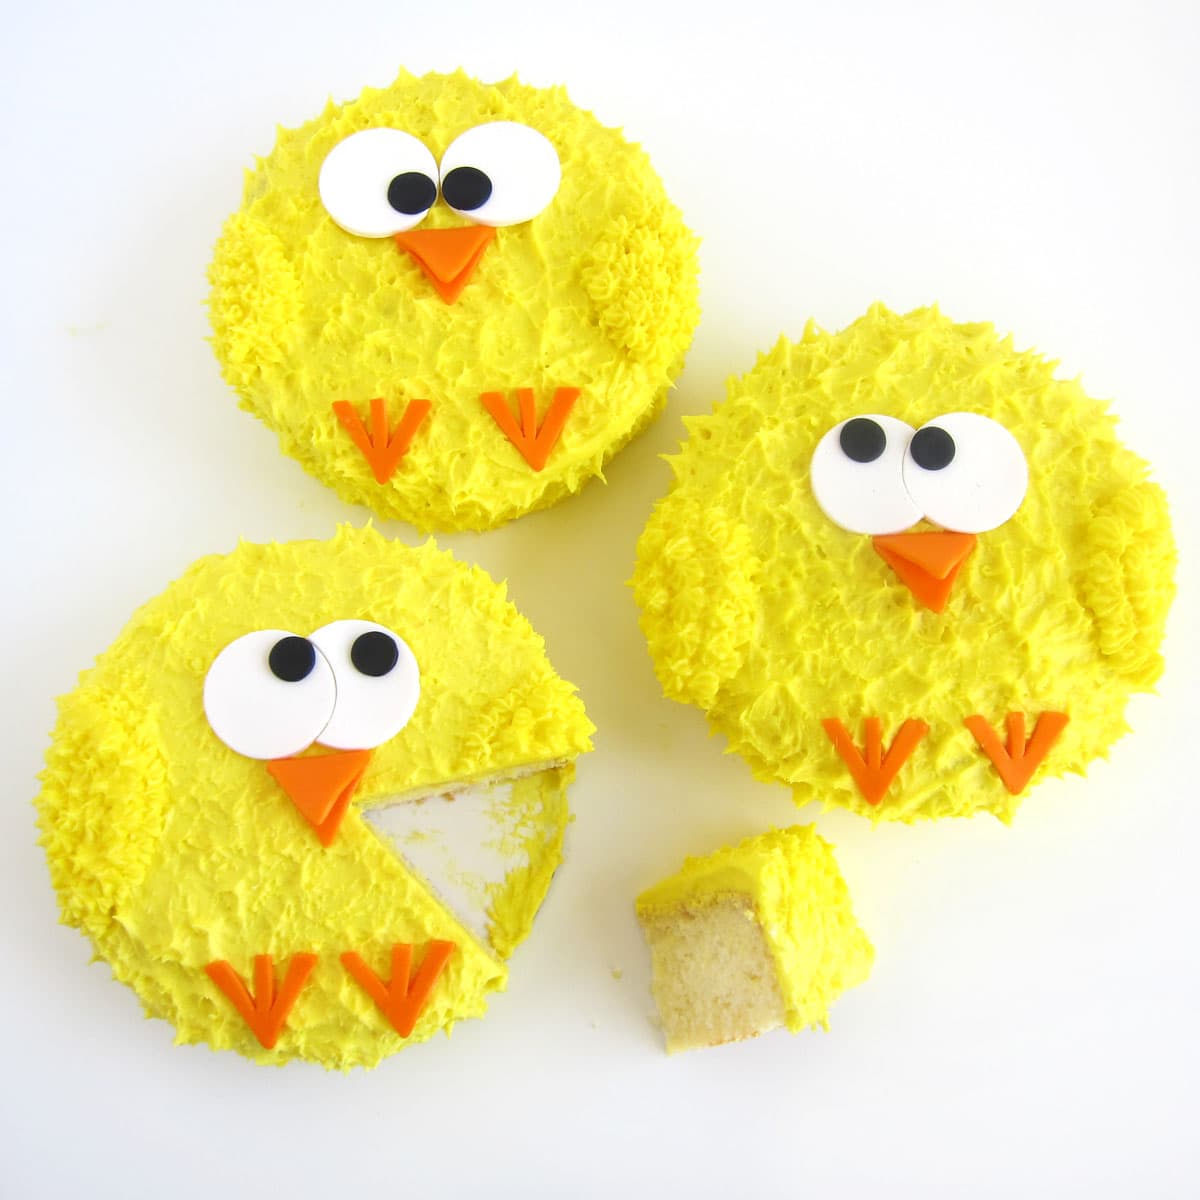
I started with a basic yellow chick (an egg-shaped rice krispies treat dipped in yellow candy coating) that had a cracked shell, two little eyes, and a bright orange beak.
Then I began to embellish. Some chicks got wings, others got a tuft of hair or head feathers. Most had plain white shells, but a few looked like they were hatching from a decorated Easter egg.
White modeling chocolate is used to create the decorations and you can decide just how elaborate those decorations will be. Let your imagination run wild.
Easter Hatching Chicks Rice Krispies Treat Pops
Ingredients
12 Kellogg's Rice Krispies Treats
16 ounces white confectionery coating/candy melts or yellow candy melts
1 white modeling chocolate recipe (16 oz. white chocolate, ⅓ cup corn syrup)
candy colorings Yellow, Orange, Black
optional candy colorings Blue, Pink, Green, Violet
water
powdered sugar to dust work surface
12 wooden craft sticks
Supplies
rolling pin
egg-shaped cookie cutter (about 2" wide by 3" tall)
round pastry tip #7
2 baking sheets (that will fit into your freezer)
parchment paper
optional: tweezers (use new tweezers)
Instructions
Read my instructions for melting chocolate and making modeling chocolate before you begin.
If you are looking to use homemade Rice Krispie Treats, head on over to my new website, HowToMakeRiceKrispies.com. You can also check out how we taste-tested 20 versions of the Rice Krispie Treat recipe to come up with the absolute BEST Rice Krispie Treat Recipe. Use this to add some extra flavor to your creation!
Just follow the recipe in the link provided, cut them into the shapes needed, and use them in the steps below:
To create the rice krispies treat hatching chicks:
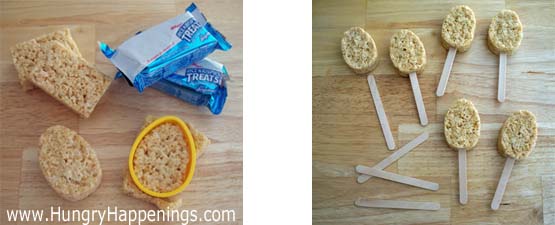
- Unwrap the rice krispies treats.
- Use the egg-shaped cookie cutter to cut each of the treats into an egg shape. If your egg cutter is just a bit bigger than your cereal treat.
- Press the cereal treat into the cutter, molding it into an oval shape.
- Insert a wooden craft stick about 1" into each cereal treat oval.
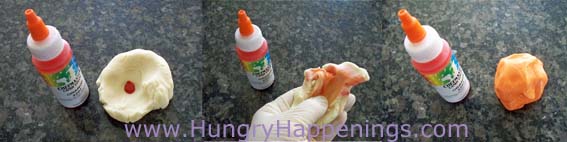
- Pinch off about 1 tablespoonful of white modeling chocolate and color it orange.
- Also, make some black. For detailed instructions, click here.
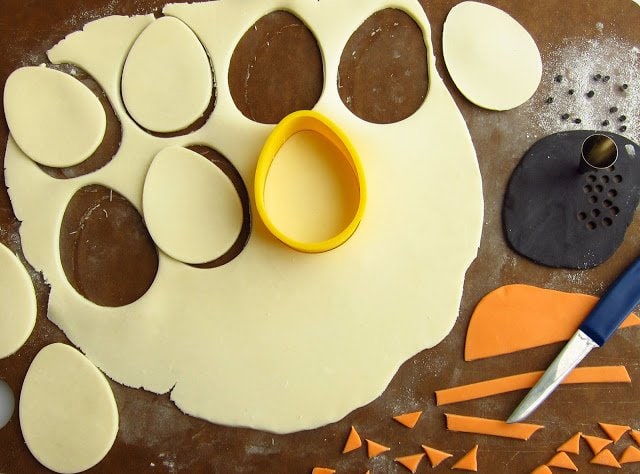
- Dust your work surface and rolling pin lightly with powdered sugar. Roll white modeling chocolate out to 1/16"-⅛" thickness.
- Use the egg-shaped cookie cutter to cut 12 ovals, re-rolling modeling chocolate as needed.
- Roll out orange modeling chocolate and cut it into ¼" strips.
- Cut into small triangles (for the beaks.)
- Roll out black modeling chocolate.
- Press the tip end of pastry tip #7 into the modeling chocolate.
- Continue to press a few times.
- Then turn the tip upside down and tap it on the counter to release the very small circles of modeling chocolate.
- You will need 24 black dots for the chicks' eyes.
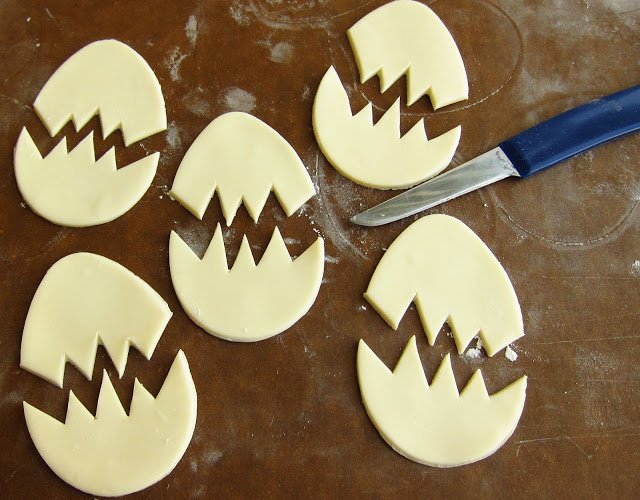
- Cut each of the 12 modeling chocolate eggs in half in a jagged pattern. You will use all of the bottom halves.
- If you choose to use the top halves, you will want to cut another jagged edge about halfway through the top half, making the top shell small enough so that the eyes and beak can show through on each chick.
If you want to embellish your chicks (as seen in the picture at the top of this post and at left) make all of your decorations before you begin dipping your rice krispies treats in the yellow chocolate.
To create the little wings, cut out small rounds of the yellow modeling chocolate using a ½"-¾" round cutter. Then use that round cutter to cut off the top ⅓rd of the round. Cut out feathers and hair using a small knife.
To decorate your egg shells, color more modeling chocolate with various colors. I made my polka dot egg (at left) by cutting small circles out of pink and green modeling chocolate using the #7 round pastry tip. Adhere modeling chocolate decorations to the modeling chocolate eggs using a small amount of water.
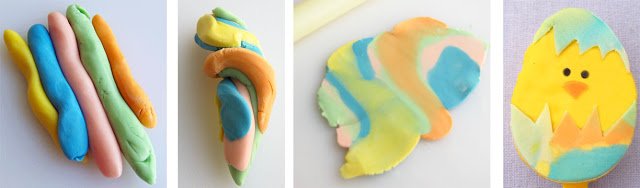
- If you would like to make swirly-looking eggs.
- Create several different colors of modeling chocolate.
- Roll each color into a very thin log.
- Set the logs next to each other and twist and spin the large log to swirl the colors together.
- Roll it out and cut the swirled modeling chocolate into eggs.

- Melt the white (or yellow) confectionery coating wafers in the microwave. (Click here for detailed melting instructions.)
- Pour wafers into a microwave-safe bowl.
- Heat on high power for 30 seconds, remove from microwave and stir. Heat for 20 seconds, and stir.
- Heat for 15 seconds, and stir.
- Heat for 10-second increments, stirring in between each, until the confectionery coating is melted. To color the white coating, squeeze in about 10 drops of liquid candy coloring. Stir.
- Add more color until you reach your desired shade of yellow. If using a jar of yellow coloring, dip a toothpick into the coloring and add coloring to the bowl of coating.
- Throw that toothpick away and use a clean one if you need to add more coloring. If you use yellow coating, you don't need to add any coloring.

- Line baking sheets with parchment paper. Now you are ready to begin dipping your rice krispies treats.
NOTE: Have all of your modeling chocolate pieces close at hand. You will make and decorate one chick at a time and need to put your dipped pops into the freezer fairly quickly, or you will end up with white streaks on your yellow pops. So dip and decorate a few pops then freeze them. The number of pops you will dip before freezing will depend on how quickly you work. Get the pops in the freezer before the yellow coating becomes hard.
- Pour the yellow coating into a tall glass or measuring cup, leaving an inch between the top of the coating and the top of the glass.
- If you fill it too high, you will spill the coating when you dip your first egg-shaped cereal treat.
- Holding a stick, dip one hatching chick rice krispies treat to pop into the yellow coating.
- Remove the pop from the coating and allow the excess coating to drip off. Tip: Dip just the tip of the pop back into the chocolate several times. This action will help to pull the excess coating off of the cereal treat.
- Then gently shake the pop a few times to remove the coating that is dripping from the tip of the pop.
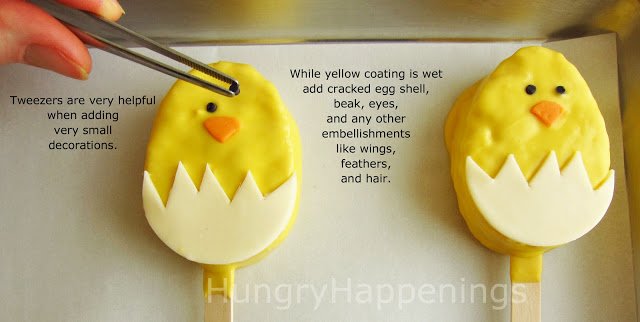
- Set the pop on your lined baking sheet. Immediately top with the bottom part of the cracked egg, a beak, and eyes. Also add any wings, feathers, or hair and the top part of the cracked egg, if using.
- Freeze decorated pops for about 10 minutes, just until hardened. Don't leave in the freezer for too long, or your yellow pops can become streaked and sticky.
- Add more yellow coating to your glass as needed. If your coating starts to become thick, reheat in the microwave for 10-15 seconds.
- Stir the coating and continue dipping your pops. You will have excess yellow coating (it is necessary in order to dip all of your pops). You can simply spread it on a parchment-lined baking sheet and freeze it for 10 minutes to save for another use.
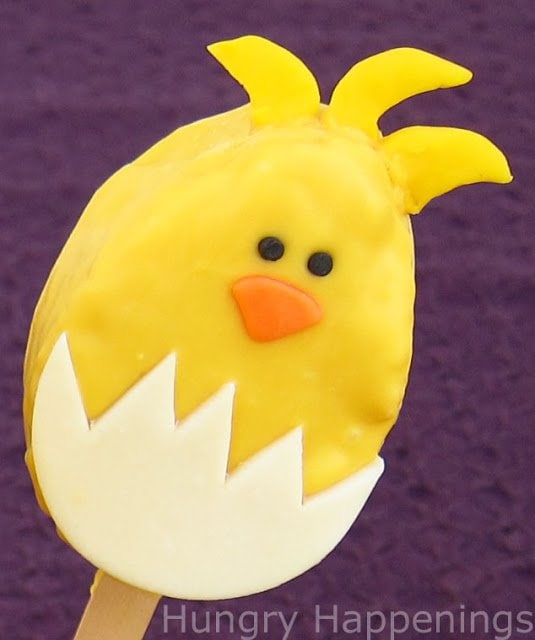
You can also add embellishments, like feathers after your pops are frozen. Allow your hatching chick pops to come to room temperature first.
Then just add a dab of melted yellow coating to the decoration and adhere it to the pop. I added this chick's head feathers by dipping them in the yellow coating and placing them on the chick's head.
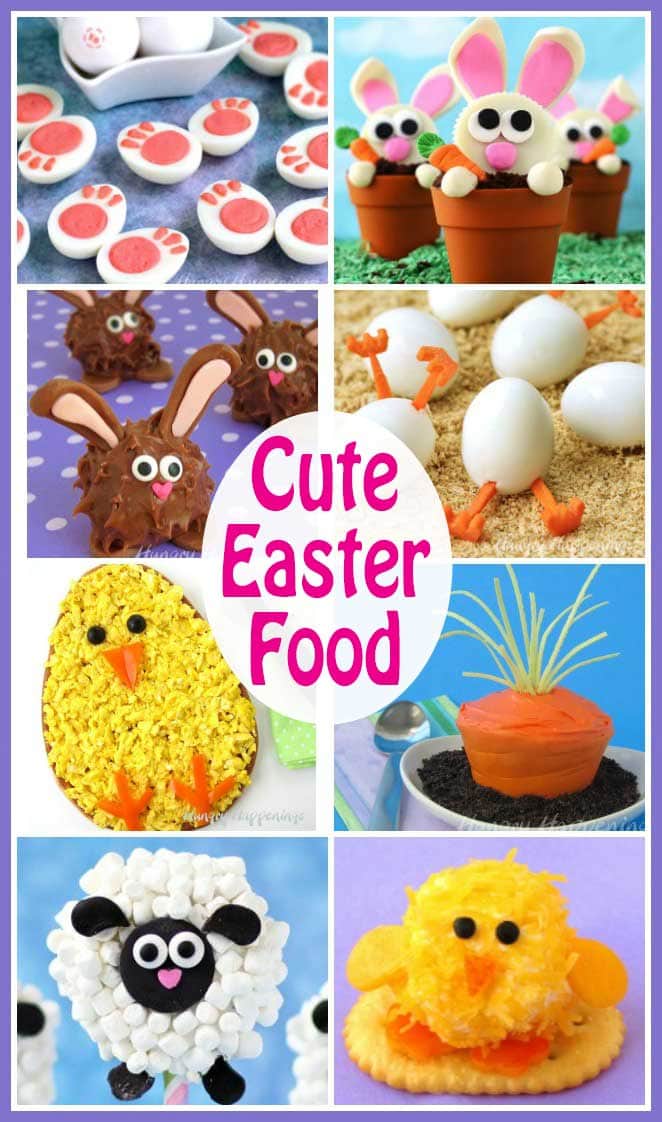
If this Easter Recipe interests you, then you should go and check out all these other delicious ideas.

- Banana Split Bars – A Fun and Easy Summer Dessert - March 4, 2026
- Pineapple Fudge (No Candy Thermometer Needed!) - March 4, 2026
- No-Bake Peanut Butter Pie Recipe - March 3, 2026
Laura Beth says
These are absolutely ADORABLE! I definitely pinned them for next spring :o) I'm including this sweet treat in my round up from guest hosting with Ginger at Ginger Snap Crafts!
Beth Jackson Klosterboer says
Thanks for including these in your round up:) I do appreciate it and am happy you like these sweet little treats.
Brooke says
Stopping by from TGIF link party. These are amazing! Pinning for next year.
Tamika Rybinski says
these are so cute! you did a great job!
Melissa says
I love them! They are so adorable!
Amy says
Those are the cutest things ever! I would almost hate to eat them. I would love for you to come share some of your items at my link party if you have time.
Amy
homehappyhome.blogspot.com
Our Pinteresting Family says
I love absolutely love these! I have never seen anything like them. Megan
Crafty Mischief says
These are SO CUTE! My kids would love them!
Mama Jodi says
These are adorable. What a great idea! I like the thought of putting Krispy Treats on a stick. I haven't seen that before.
4 Sisters @ bringingbeauty.blogspot.com says
These are adorable! We have our first ever Beautify It Monday link party going on now and we'd love if you stopped by to link up - bringingbeauty.blogspot.com
Dorothy @ Crazy for Crust says
Again - gorgeous. I never can get enough of your cute stuff!
MissCandiquik says
Yep - you have a cute blog. Everything is plain cute!
MyKidsMake says
those are REALLY cute!!!
hkc says
I love the look of the marbled eggs!
Erin says
These are fantastic! I love them!!!
Robyn says
These are adorable!!! What a great idea!