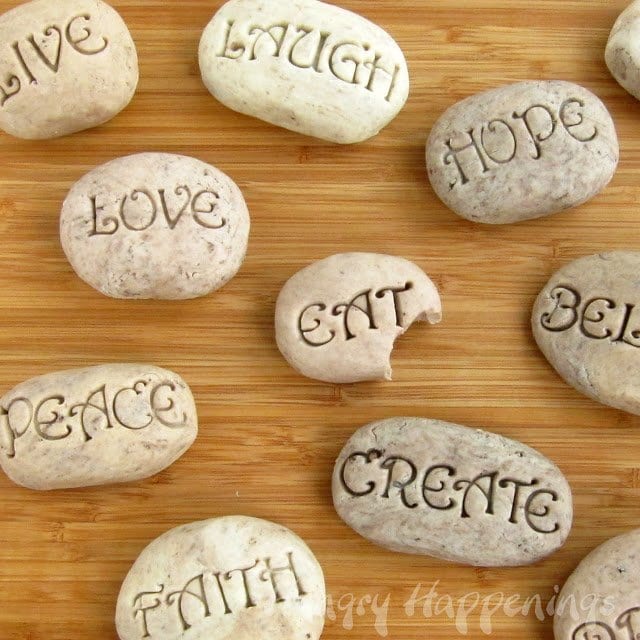
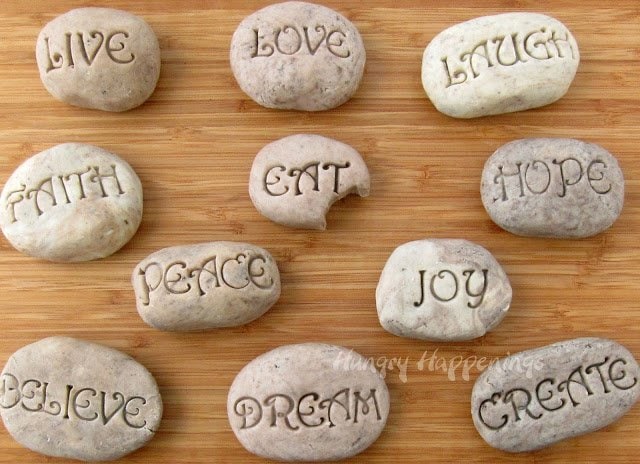
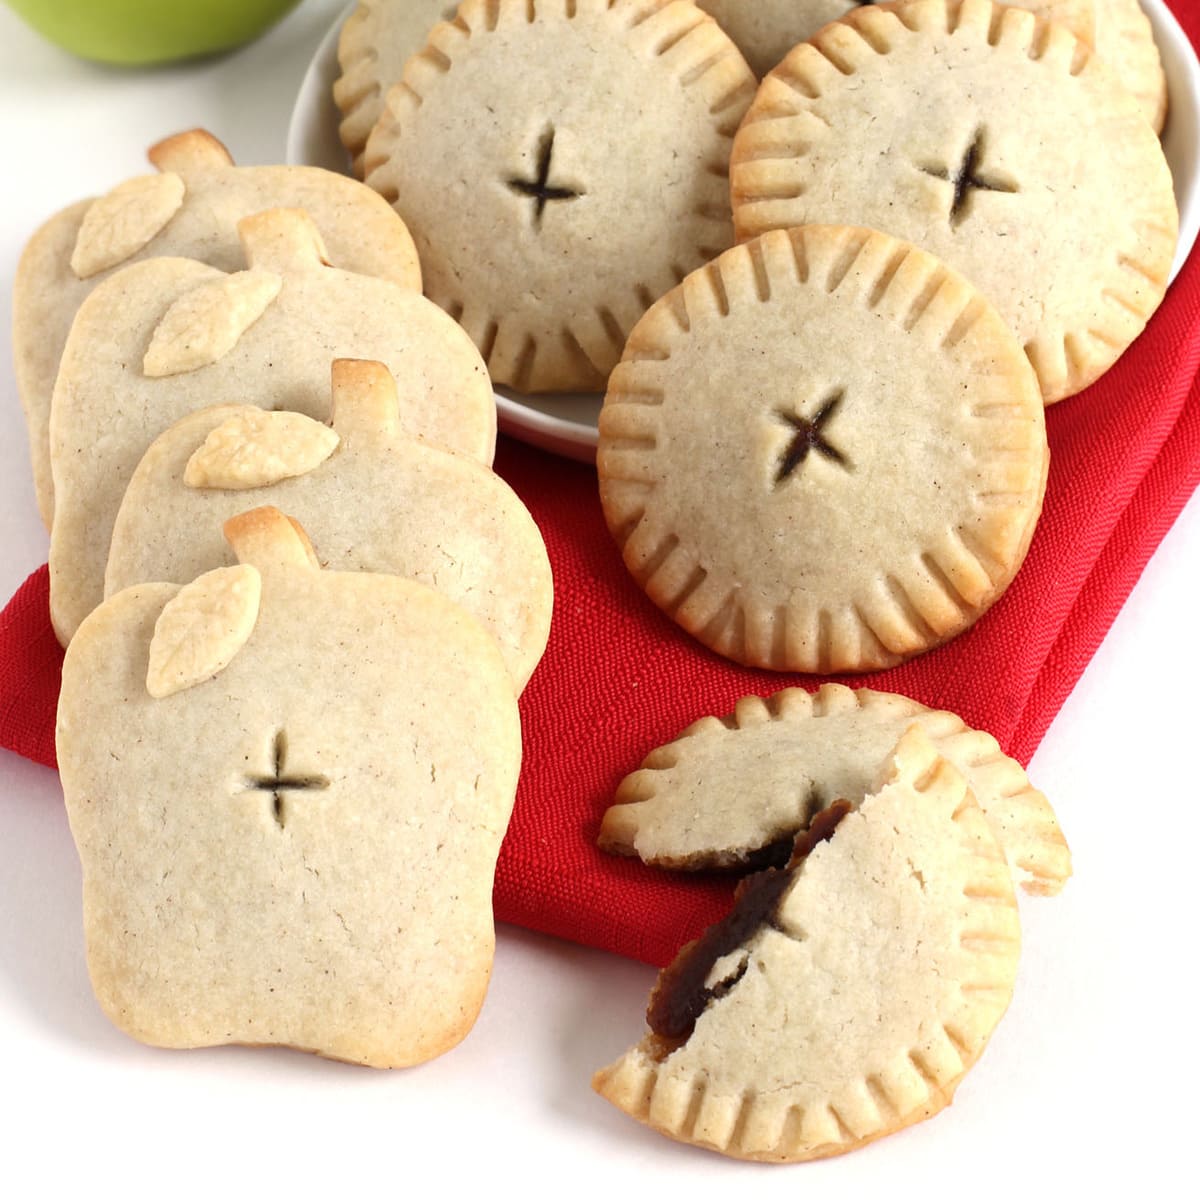
Make edible serenity stones by imprinting rock-shaped cookies and cream fudge with words like "live," "laugh," "love," and more. These Sweet Serenity Stones are the perfect treat to give to the special people in your life.
Just a few days ago I shared with you a recipe to make cookies 'n cream fudge rocks for a fun Father's Day project.
While I was creating my sweet stones, this idea popped into my head and I just had to share it. I know this is the third edible rock recipe to grace these pages in the past month and some of you may be saying, "Enough already," but I think this one is really great and worth sharing. I promise I'm done with this idea, for a while.
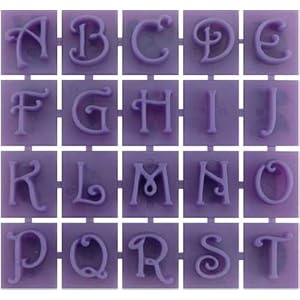
I had just purchased some stone stamps last week, not really knowing what I'd do with them, but figured sooner or later, I'd have the perfect project idea. These plastic letter stamps can be used to make garden stones or used in any type of clay including the chocolate variety.
After I made my stone mountain the other day, I pulled out the stamps and tried them out in my fudge rocks. They worked perfectly. I reworked my original mountain of rocks into 11 large rocks for this project. Then I spent less than ten minutes adding a nice variety of inspirational sayings.
These stones look and feel like the real deal, but taste divine!
RELATED: Find dozens of easy fudge recipes at HowToMakeEasyFudge.com.
Sweet Serenity Stones (makes 10-12)
Ingredients
white chocolate
sweetened condensed milk
OREO Cookies
optional colorings: cocoa powder, red food coloring
Supplies
1 set of Victorian Style Letter Stone Stamps
You can find items used for this project on Amazon. I earn a small commission when you use the Amazon links in this post to make a purchase at no extra cost to you.
 Merckens Super Coatings, Wh...Shop on Amazon
 Midwest Products Co. Midwes...Shop on Amazon
Instructions
Make the cookies and cream fudge rocks.
See the Fudge Rocks tutorial for step-by-step instructions for making the cookies and cream fudge stones or see the recipe below.
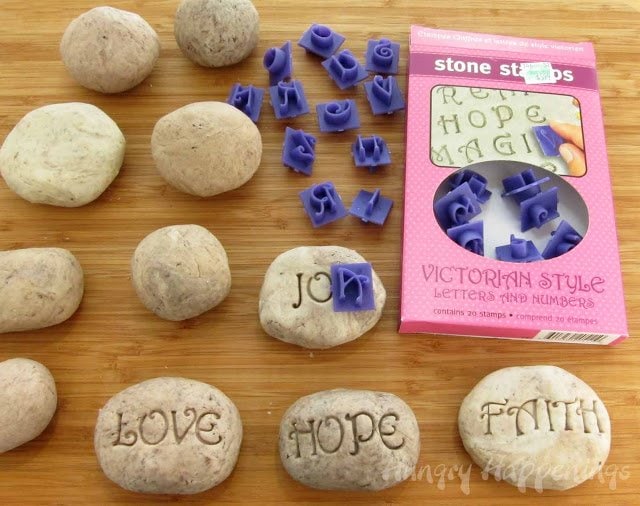
Roll your cookies 'n cream fudge into various shapes and sizes. You'll need your edible rocks to be large enough to stamp out your inspirational phrases.
Press the stamps into the candy stones creating whatever sayings you'd like. You may have to hold the fudge as you pull up the stamp so you don't distort your letters.
Just a note - you can see that the stamps have letters or numbers on both sides. I pressed the "Y" into the stone which featured the word, "JOY," but you are seeing the "A" that is on the back side of the stamp.
That's it. You are done! Super easy, isn't it?
Variations
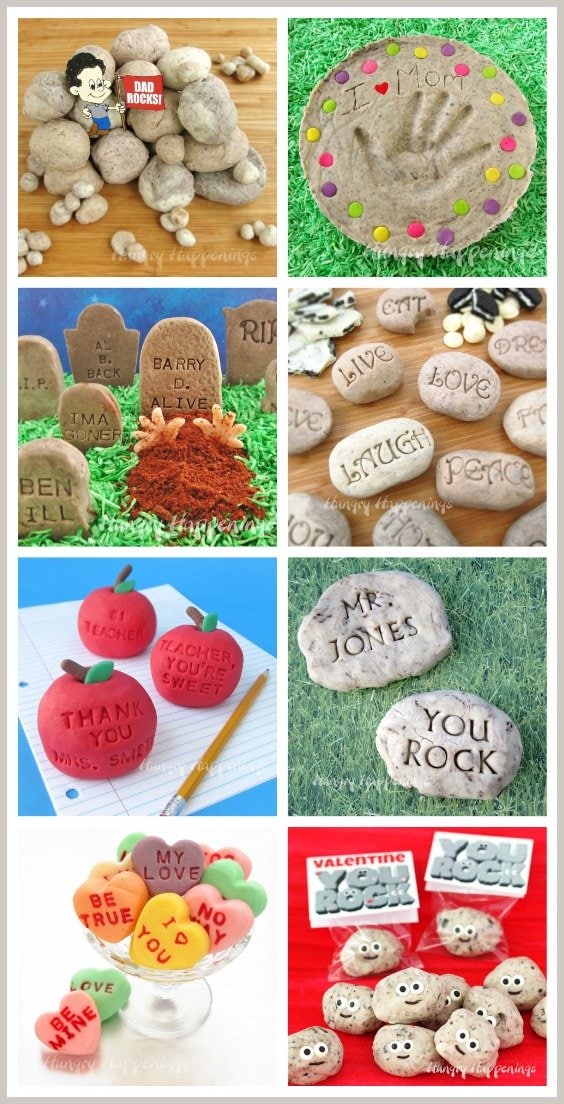
You can also make these other fun candy stone recipes: Fudge Garden Stone, Fudge Tombstones, Fudge Teacher’s Apples, Edible Rocks for Teachers, Fudge Conversation Hearts, and Cookies ‘n Cream Fudge Rocks.
Recipe
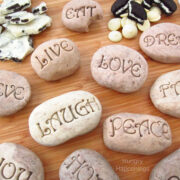
Cookies and cream fudge stones stamped with sweet messages like "live," "laugh," "love," and more.
- 24 ounces white chocolate chips, candy melts, or almond bark
- 14 ounces sweetened condensed milk
- a pinch of salt
- 11 OREO Cookies, crushed into crumbs (about ⅔ cup)
- ½ teaspoon cocoa powder optional
- 1 drop red food coloring optional
-
Combine the white chocolate, sweetened condensed milk, and salt in a medium saucepan.
-
Set the pan over low heat.
-
Stir often until about 50% of the white chocolate has melted.
-
Remove the pan from the heat and let it rest for 5 minutes.
-
Then begin to stir, add ¼ cup of the OREO cookie crumbs, and stir until blended.
-
Use the fudge as is, or divide it into separate bowls, adding cocoa powder, more oreos, or red food coloring to acheive a variety of colors.
-
Cover the fudge with plastic wrap and let the fudge cool for at least 30 minutes until it is thick and no longer sticky.
-
Pinch off varying sizes of fudge and shape into rocks that are large enough to imprint sayings.
-
Press alphabet garden stones into the rocks to create sayings like "live," "laugh," "love," etc.
Store these fudge serenity stones in an airtight container at room temperature for up to 2 weeks. You can also freeze these for up to 3 months.

- Banana Split Bars – A Fun and Easy Summer Dessert - March 4, 2026
- Pineapple Fudge (No Candy Thermometer Needed!) - March 4, 2026
- No-Bake Peanut Butter Pie Recipe - March 3, 2026

Anonymous says
Just purchased the letters... This is a great idea! I can't wait for my letters to come in to make these.
Beth Jackson Klosterboer says
Have fun with your letters. I can't wait to make more projects using mine.
greenmm says
OMG...every year I tell my kids they are getting rocks for Christmas, this year they will. haha 🙂 and I have the stamps, too.
Beth Jackson Klosterboer says
That will be hysterical! Great idea.
LP @dishclips says
So cute and decorative. I bet they are delicious.
Heather Kinnaird says
what a fantastic idea!
SammiMae says
How clever! I happen to have these stamps, I bought them not knowing what to do with them either 🙂 I guess I found it!
Beth Jackson Klosterboer says
I'm so happy you now have a fun use for your letters. I wish I had bought them before I made my Mother's Day garden stone. I'm sure I'll find many more uses for them now that I know how great they work.
JoanieJ says
What a GREAT idea, Beth! I love it and can't wait to try it... 🙂
scrap_boro says
I love these....may have to try this out with my mint recipe for wedding and baby showers. So many ideas!!!!! Just a hint to try powdered sugar to prevent sticking.
cupsbykim says
I love these! They would be perfect for a wedding reception or something like that! I'm going to have to go buy me some letters!!
Karla says
I love this!!! At first I thought they were real rocks lol. Then I saw the "eat" one and was confused for a second. haha. Awesome idea.
Beth Jackson Klosterboer says
Thanks Karla. I knew at first glance people would find that stone odd, especially being it had a bite taken out of it:)
Gina says
Coming to you from Wow Me Wednesday. Very creative idea.
Raspberry Lane Farmhouse Living says
Way cool idea!!...love these stone cookies! I'm going to get some of those letters too...would love to use them on baked salt dough...I'd also love to post your tutorial on pinterest, if that's okay. Let me know.
Thanks so much for this cute idea!
Patti 🙂
Beth Jackson Klosterboer says
Thanks! I was really happy with how well the letters worked on the fudge and am sure they'd work great on baked salt dough too. I appreciate you pinning any of my projects:)
CuteEverything.com says
Pinned!
CuteEverything.com says
These are just wonderful! I saw them today in my email and was just amazed by them. Thanks very much for linking them up! I assume that they turned out at least as well as you had hoped, because they are perfect! The font really makes it for me, and they look just exactly like the real serenity stones, which I love BTW. Fantastic job, Beth!
Anonymous says
Very cool!
Erin says
OH MY HECK!!! I LOVE these! How fun and so clever!!!
sugarswings says
they look so totally real! awesome job 🙂
Elizabeth L in Apex, NC says
Can't wait to try this - thanks!!
The Partiologist says
Okay, there should be 5,000 comments on how creative these are! You totally ROCKED these!! 🙂
Beth Jackson Klosterboer says
Thanks! Oh, how I'd love to see 5000 comments on any of my posts. Heck, I'm happy when I get 50!
ThisGirlBlogs says
This is such a cute and fun idea! Brilliant! 🙂
Danielle says
love this - so creative!